What does the Distort command do?
How does the Distort command work?
Vectorworks 2008 and up.
2D only, be careful with Rotated Plan views and moved User Origins.


Distort


What does Distort do
Distort is a menu command that allows you to pull on one corner of a group and have all objects inside that group follow the distortion, more or less like you would be able to distort a single rectangular shaped polygon using the Reshape tool.
Requirements:
-
•A group containing the objects to be distorted.
-
•A start geometry. (a polygon or Rectangle - Polylines are not suported)
-
•A destination geometry. (a polygon or polyline)
-
•The start geometry must be rectangular and have 4 vertices.
-
•The destination geometry must have 4 vertices.
-
•All sides of the geometries must have an equal number of vertices.
-
•The starting point of the start and destination polygons/polylines must correspond, or the figure might rotate.
Select the group and the two polygons/polylines and choose Distort from the Tools menu. Next you will be asked to click on the start geometry and the distortion process will start. Depending on computer speed, and the amount of data this may take a while.
How does Distort work


Polygon
Polygon

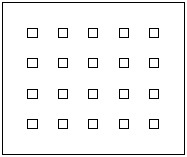
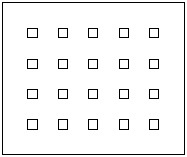


Instead of just moving a vertex, as the Reshape tool does, Distort affects the whole area of the selected figure(s):
Distort

Distort

Distort
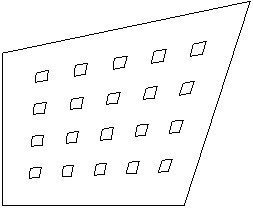
The whole surface is stretched like a piece of rubber.
The objects related are distorted in a similar fashion, according to their position in the figure.
(Objects that don’t allow distortion, such as Rectangles, Circles, Symbols and Plugin Objects will not be distorted, just moved! See below).
But you can also opt to just move the related objects. The moving distance is calculated based on the position of the objects’s centre, or, for symbols and PIO’s, their insertion point.

Distort


destination
Start
destination
Start
Group
Group
Moving a vertex with the Polygon Reshape tool.
How do I get Distort
Distort is freely availbale for members of the Jonker & Wu Support group.
Check the download page. For installation see this FAQ page.

